Rapidoreach Docs
Getting started
Callbacks
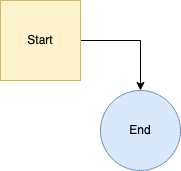
The Callback is the basis by which you can reward your users. The Callback is a GET request that is sent to your processing script upon the conclusion of a transaction - either a complete COMPLETE, screenout TERMINATION, or overquota QUOATAFULL.
This request contains important information about which user needs to be rewarded, what offer was taken, and how much virtual currency they should be paid.
Setup Callback
RapidoReach supports secure hasing on system-to-system callbacks. Please reach out to a RapidoReach account manager to configure the Callback URL. Follow the steps below to complete your setup.
How to create a Processing Script
- Create an endpoint that can receive a GET request to its location.
- Reward your users for completes and screen-out rewards (if applicable).
- Store information in your database
- Respond with a 1 if callback received & processed correctly and 0 if you require us to repeat the callback (can be repeated three more times).
Add the Callback to your application
- Go to Apps section.
- Select your Application.
- Click on the Callback section.
- Click on the Setup Callback button.
- Enter your Callback URL.
- Click Save button.
Callback Responses
Sample processing script location (sometimes referring to a php, aspx, or another script depending on your webapp configuration)
app-domain.com/callbackParameters will be appended with their corresponding variables after the processing script location as follows:
app-domain.com/callback?cmd=transactionComplete&userId=user123-9370-d163590aa9
&amt=100&offerInvitationId=1234&status=C&oiHash=2ef1130cca32cd030141d8935dec0992
¤cyAmt=20000&transactionId=4321&endUserId=user123&offerTitle=TestProject
&useragent=RapidoReach&profiler=¤cyName=Chachingz&offerType=survey
&txnHash=66a2b2987083666c76592d505240748e&program=&transactionSource=iframe&app-domain.com/callback
'?cmd=' // QUOTAFULL, COMPLETE, TERMINATION
OfferStatus //
'&userId='
RORuserId // RapidoReach userId as generated earlier.
'&amt='
Dollar_AMT.toFixed(2) // Amount paid in dollars to you for this particular transaction.
'&offerInvitationId='
TransactionId // Enables you to remember for which offer a user has been rewarded for.
'&status='
OfferStatus // Compete - Disqualified - QuotaFull
'&offerHash='
offerHash //32 character hex string = md5(concat(offerInvitationId, applicationKey))
'¤cyAmt='
VC_AMT.toFixed(2) //Payout to user in your virtual currency. Important for screenout rewards.
'&transactionId='
TransactionId //Unique ID representing a single user participating in a single survey/offer,
'&endUserId='
endUserId
'&txnHash='
transHash //md5(concat(transactionId, current TransactionKey))
'&useragent='
'Rapidoreach'
'¤cyName='
app.vc_name
'&offerType='
OfferType
'&deviceType='
DeviceType
'&intergrationMethod='
'IFRAME';Callback Parameters
cmd
will always be transactionComplete
userId
RapidoReach userId as generated earlier.
amt
Amount paid in dollars to you for this particular transaction.
offerInvitationId
Enables you to remember for which offer a user has been rewarded for.
status
- QUOTAFULL - user screened out of survey, the required number of responses from this demographic has already been met.
- COMPLETE - user successfully completed the transaction.
- TERMINATION - user screened out of survey, does not have the relevant attributes needed.
oidHash
32 character hex string = md5(concat(offerInvitationId, applicationKey))
You should verify oidHash upon receipt of the callback by recomputing it with the callback offerInvitationId and your ApplicationKey. This will secure against users faking their own id and passing it in if by some chance they come across the script.
currencyAmt
Payout to user in your virtual currency. Important for screenout rewards.
integer (default) or float (on request)
Indicates how many points the user should get in your site’s virtual currency. Based on your configured conversion rate on the control panel. Negative values indicate chargebacks.
transactionId
Unique ID representing a single user participating in a single survey/offer, please include if requesting support for a particular transaction.
txnHash
32 character hex string = md5(concat(transactionId, current TransactionKey)) You can find your TransactionKey in your Application list.
Optional Parameters
sub_id
Optional alias identifier to track traffic on campaigns, can be used for testing and segmentation purposes. Please ask our team to enable sub_id for you.
IP Whitelist
We highly recommend whitelisting the following IPs to secure your system from fraudulent callbacks. If the following list is update, you will be notified via email prior to the change.
161.97.78.55, 173.212.227.149Setup callback IP whitelist
- Go to Apps section.
- Select your application.
- Click on the Callback section.
- Under the IP Whitelist section click the Copy IP Whitelist button to copy the IPs to your clipboard.
How to Test the Callback
First ensure that you have whitelisted the IPs listed in the above section.
Instructions
- Go to Apps section.
- Select your Application.
- Click on the Callback section.
- Click on the Test Callback button.
- Fill out the form with the parameters you want and click the invoke Test Callback button.
- Get your results.
Redirects
We support two separate links, one for successful completes, one for everything else
If you’d like to setup custom redirect URLs, contact your Rapidoreach account manager. We don’t support redirect hashing; we use secure hasing in our system-to-system Callbacks.
We return a handful of query parameters describing the session result in the URL:
transactionId
Transaction ID
userId
The three part RapidoReach user ID
endUserId
The user ID passed in the entry URL
status
The status of the transaction: C, P, or F.
sub_id
A custom tracker ID that you may pass with the user in the entry URL.
Example
https://www.rapidoreach.com/success=true&status=#status#&transactionId=#transactionId#&userId=#userId#&tempId=#tempId#&sub_id=#sub_id#Advanced Redirect Values
If you’d like to receive additional data about user sessions, add tcode to your Redirect URL:
tcode = #tcode# Below are the possible values you will receive the the tcode parameter.
| Description | Code |
| Matcher Failed | 1 |
| Dropout | 2 |
| No Prescreeners available | 3 |
| Profiler Screenout | 4 |
| Transaction C (Complete) | 5 |
| Transaction F (Quota Full) | 6 |
| Transaction P (Screenout) | 7 |
| Internal Error | 8 |
| Missing Entry URL Parameters | 9 |
| Invalid Hash Code | 10 |
| Project Not Launched | 11 |
| Under Age User | 12 |
| User Already Completed Survey | 13 |
| User Banned | 14 |
| IP Banned | 15 |
| ISP Banned | 16 |
| Throttling error | 17 |
| No Matches | 18 |
| Matcher Timeout | 19 |
| Matcher Exception | 20 |
| Doesn’t Match Survey | 21 |
Iframe Offerwall
User Ids
Iframe
The Reward Center is an iframe embedded on your site containing a list of incentivized surveys and offers. It’s one of our simplest products to integrate and requires zero maintenance.
Engage your audience with these earning opportunities and get paid every time your user completes one.
Understanding the RapidoReach User ID
Every user needs an ID to enter a survey.
The UID is made up of three parts:
- The Internal User ID
- Application ID (App ID)
- The Checksum.
This 3 part ID isn’t required for the Project API or the Invite API.
Example UIDs
test123-1sJ57hgit-838ab4b72d221a585af8b4bff7a540231
Marialukeskywalker-7sJ51hghg-838ab4b72d221a585af8b4be7a540232
LucasPrincessLeia-9sh57hgty-238ab4b72d88rj1a585af8b4be7a540235
BuzzLightyear-4sJ17hgih-638ab4b72d2jdfj585af8b4be7a540236
FaMulan621-3sJ47hgis-738ab4b72d221a585asdnb4be7a5402675
1969072078348482-9sJ57hyur-138ab4b72d2sdfa585af8b4be7a540786
Internal User ID
The Internal User ID is a case-sensitive alphanumeric string of up to 240 (we recommend keeping them short) characters in length. It should correspond to the user’s ID in your database.
Application ID
The Application ID (App ID) is your application’s numerical identifier. Each application you create has a unique App ID. You can find your App ID below the application name in the application list.
Checksum
Generating a checksum is important to keep every transaction secure and protect the integrity of every generated user ID. It is essential for creating a proper user ID. Sequentially, the checksum comes as the third section of the UID. This can be generated in every programming language (e.g. Python, C#, Golang).
The Checksum is composed of the first 10 alphanumeric characters of the MD5 hash generated string of the Internal User ID, App ID, and Security Key. Since you already know what the Internal User ID and the App ID is, let us talk a little about your Security Key.
Security Key
The Security Key is an alphanumeric case sensitive string generated upon the creation of your application. It is unique to every Application and ensures the integrity of the integration. You can find the Security Key in the integration section of the application.
User Profiles
Depending on the product, you may also register a profile for each of your users.
Generate the User Ids
Generate the User ID First things you’ll need are the UID ingredients. The Internal User ID (for each of your users), App ID, and Security Key.
internalUserID = User123
appID = 1sJ57hgit
securityKey = 838ab4b72d221a585af8b4be7a540234
Generate an md5 hash of the combined string using your programming language’s md5 function (using Python 3, it is in a library called hashlib). Then concatenate the first 10 characters of the md5 hash. Make sure the Checksum is lowercase.
Generate an md5 hash of the combined string
Concatenate the first 10 characters using hexdigest(:10)
concat_input = internalUserID + appID + securityKey
checksum = hashlib.md5(concat_input).hexdigest()[:10]
Combine them all into one to create the PL UID.
PL_UID = internalUserID + “-” + appID + “-” + checkSum
Repeat this process for each of your users to create their User ID.
Examples
Here are examples of how to do this process using 3 different programming languages.
Python
#This Script Produces a PL User ID using Python
import hashlib
import sys

endUserId = "User123" #insert internal user ID here
applicationKey = "54dbf08d625158c6d7b055928d6ac0cc" #insert application key here
applicationId = "9145" #insert App ID here.

checkSum = hashlib.md5(endUserId + applicationId + applicationKey)
userId = endUserId + "-" + applicationId + "-" + checkSum.hexdigest()[:10]
print(userId)
Ruby
require 'digest'
end_user_id = 'test_user'
publisher_id = '1'
security_key = '00000000000000000000000000000000'
hash = Digest::MD5.hexdigest(end_user_id + publisher_id + publisher_security_key)
user_id = "#{end_user_id}-#{publisher_id}-#{hash[0..9]}”
C#
System.Security.Cryptography;

public class Program
{
 public static void Main()
 {
    var endUserID = "User123"; //assuming a member id for their user to be 3. Make sure to change it for every user
    var publisherId = "9165";
    var securityKey = "34101a01e1f305b39d16283d5dd05194";
          var hash = CalculateMD5Hash(endUserID + publisherId + securityKey);
    var userId = endUserID + "-" + publisherId + "-" + hash.Substring(0, 10).ToLower();
    var iFrameURL = "https://www.rapidoreach.com/offerwall/?userId=" + userId + "&dob=03-03-1979&sex=1"; //make sure to append the correct dob and sex for every user
          Console.WriteLine("Generated user id is :{0}", userId);
          Console.WriteLine("Generated iFrameURL is :{0}", iFrameURL);

 }
  public static string CalculateMD5Hash(string input)
        {
            // step 1, calculate MD5 hash from input
            MD5 md5 = System.Security.Cryptography.MD5.Create();
            byte[] inputBytes = System.Text.Encoding.ASCII.GetBytes(input);
            byte[] hash = md5.ComputeHash(inputBytes);

            // step 2, convert byte array to hex string
            StringBuilder sb = new StringBuilder();
            for (int i = 0; i < hash.Length; i++)
            {
                sb.Append(hash[i].ToString("X2"));
            }
            return sb.ToString();
        }
}Embed offerwall iframe
Creating your Rewards Center iFrame is easy and simple. You just need a page with enough space to run it on your webpage/webapp.
You’ll need to dynamically generate the Rewards Center link based on the RapidoReach UID. This ensures that every user gets the right credit for their activity. First generate the RapidoReach UID using a script on the server, and pass that to the website.
Embed the iframe
Append the dynamically generated User ID to the end of the User Greeting. userGreeting = https://www.rapidoreach.com/offerwall/?userId= Example:
Join User Greeting with the RapidoReach UID:
https://www.rapidoreach.com/offerwall/?userId= + 597a0ed87760ae04c29975ee-1sJ57hgit-838ab4b72d221a585af8b4be7a540234Becomes User Greeting URL:
https://www.rapidoreach.com/offerwall/?userId=597a0ed87760ae04c29975ee-1sJ57hgit-838ab4b72d221a585af8b4be7a540234Enclose your User Greeting URL in the iframe tags as shown below:
<!-- Template -->
<iframe src="{{userGreetingURL}}" width="880px" height="2500px" frameborder="0" scrolling="no" name="RewardsCenter"></iframe>
<!-- Sample Iframe -->
<iframe src="https://www.rapidoreach.com/offerwall/?userId=597a0ed87760ae04c29975ee-1sJ57hgit-838ab4b72d221a585af8b4be7a540234" width="880px" height="2500px" frameborder="0" scrolling="no" name="RewardsCenter"></iframe>Integration Methods/Guides
iOS SDK
RapidoReach iOS Integration Guide
Get Your API Key
Sign-up for a new developer account and create a new iOS app here and copy your API Key.
Install SDK
Install via Cocoapods (easiest)
pod 'RapidoReachSDK', :git => 'https://github.com/skondgekar/roriossdk.git'To install
pod installFlags
On the Build Settings tab and type in Other Linker Flags in the search field. Add the following flags.
- ObjC
Set Required Build Settings
We utilize Apple's Advertising ID (IDFA) to identify users. When uploading your app we recommend that you check all the boxes to note that your app uses IDFA and receives a smooth approval process. On the Info tab add in a Dictionary called NSAppTransportSecurity. Make sure you add this dictionary on the Top Level Key. Inside this dictionary, add a Boolean called NSAllowsArbitraryLoads and set it to YES. An example of your info.plist can be found here.
Initialize
After you have finished modifying the project settings, open your AppDelegate.swift file and import the RapidoReach SDK. Replace the YOUR_API_TOKEN with the actual api key found on your app. Replace YOUR_USER_ID with your unique ID for your appuser. If you do not have a unique user ID we recommend just using their Apple Advertising ID (IDFA). If you utilize a server-side callback, this is the user ID that will be passed back to you when a user earns a reward.
// AppDelegate.swift
import RapidoReachSDK
Next initialize the RapidoReach SDK in your applicationDidFinishLaunchingWithOptions method.
// AppDelegate.swift

static let RapidoReachAPIKey = "<YOUR_API_TOKEN>"
static let RapidoReachUSER = "<YOUR_USER_ID>"

RapidoReach.shared.configure(apiKey: AppDelegate.RapidoReachAPIKey, user: AppDelegate.RapidoReachUSER)
Reward Center
Open the .swift file of the controller where you want your users to have access to RapidoReach Reward Center. Call the presentSurvey method when you are ready to the send the user into the reward center where they can complete surveys in exchange for your virtual currency. We automatically convert the amount of currency a user gets based on the conversion rate specified in your app.
// ViewController.swift
// Import rapidoreach SDK
import RapidoReach

// Call for AppUserId
  // Do any additional setup after loading the view, typically from a nib.
  RapidoReach.shared.delegate = self
  // Fetch userId
  RapidoReach.shared.fetchAppUserID()

// Start reward center
  RapidoReach.shared.setNavigationBarText(for: "Rapidoreach")
  RapidoReach.shared.presentSurvey()
Reward Callback
To ensure safety and privacy, we notify you of all awards via a server side callback. In the developer dashboard for your App add the server callback that we should call to notify you when a user has completed an offer. Note the user ID pass into the initialize call will be returned to you in the server side callback. More information about setting up the callback can be found in the developer dashboard.
The quantity value will automatically be converted to your virtual currency based on the exchange rate you specified in your app. Currency is always rounded in favor of the app user to improve happiness and engagement.
Client Side Award Callback
For security purposes we always recommend that developers utilize a server side callback, however we also provide APIs for implementing a client side award notification if you lack the server structure or a server altogether or want more real-time award notification. It's important to only award the user once if you use both server and client callbacks (though your users may not be opposed!).
import RapidoReach

extension ViewController: RapidoReachDelegate {
    func didSurveyAvailable(_ available: Bool) {
        print("ROR: Surveys available "+(available ? "Available" : "Not Available"));
    }


    func didOpenRewardCenter() {
        print("didOpenRewardCenter")
    }

    func didClosedRewardCenter() {
        print("didClosedRewardCenter")
    }

    func didGetRewards(_ reward: RapidoReachReward) {
        print("RapidoReach Rewards Available: \(reward.total_rewards)")
        self.user?.rewards = reward
        self.bindReward()
    }

    func didGetError(_ error: RapidoReachError) {
        print("didGetError: "+error.localizedDescription)
    }

}
Testing SDK
When you initially create your app we automatically set your app to Test mode. While in test mode a survey will always be available. Note - be sure to set your app to Live in your dashboardt before your app goes live or you won't serve any real surveys to your users!
Customizing SDK
We provide several methods to customize the navigation bar to feel like your app.
RapidoReach.shared.setNavigationBarColor(for: "#00796B")
RapidoReach.shared.setNavigationBarTextColor(for: "#FFFFFF")
RapidoReach.shared.setStatusBarStyle(for: "light") // 'light' or 'dark' depending on what color of Navigation Bar is selectedAndroid SDK
RapidoReach Android Integration Guide
Get Your API Key
Sign-up for a new developer account and create a new Android app here and copy your API Key.
Download the SDK
Download the latest version of the Android SDK here. Add the RapidoReach-1.0.0.aar file to your projects "libs" folder.
Update your module's build.gradle file
Include the rapidoreach.aar, Google Play Services and androidx.appcompat in your build.gradle file. A Google Advertising ID helps us serve offers and surveys so we recommend adding the Google Play Services SDK to your project. Be sure your minSdkVersion is set to at least 16.
    apply plugin: 'com.android.application'
    ...

    android {
        ...
        defaultConfig {
            ...
            minSdkVersion 16
            ...
        }
        ...
    }

    dependencies {
        ...
        implementation 'androidx.appcompat:appcompat:1.2.0'
        implementation 'com.google.android.gms:play-services-ads:19.2.0'
        implementation (name: 'RapidoReach-1.0.0', ext: 'aar')
    }
Update your projects's build.gradle file
Ensure that your project has access to the 'libs' file by including the following in your project level build.gradle file.
    buildscript...

    allprojects {
        repositories {
            jcenter()
            flatDir {
                dirs 'libs'
            }
        }
    }
Proguard
If you use proguard in your app. Be sure to add this line to your rules file:
-keep class rapidoreach.com.** { *; }Import SDK in your android activity (MainActivity.java)
import com.rapidoreach.rapidoreachsdk.RapidoReach;
import com.rapidoreach.rapidoreachsdk.RapidoReachRewardListener;
import com.rapidoreach.rapidoreachsdk.RapidoReachSurveyAvailableListener;
import com.rapidoreach.rapidoreachsdk.RapidoReachSurveyListener;
Implement interfaces and methods (MainActivity.java)
public class MainActivity extends AppCompatActivity implements RapidoReachRewardListener, RapidoReachSurveyListener, RapidoReachSurveyAvailableListener {

    @Override
    protected void onCreate(Bundle savedInstanceState) {
        super.onCreate(savedInstanceState);
        setContentView(R.layout.activity_main);
    }

    @Override
    public void onReward(int i) {

    }

    @Override
    public void rapidoReachSurveyAvailable(boolean b) {

    }

    @Override
    public void onRewardCenterClosed() {

    }

    @Override
    public void onRewardCenterOpened() {

    }
}
Initialize RapidoReach
In your activity overwrite the onCreate() method and initialize the RapidoReach SDK with the initWithApiKeyAndUserIdAndActivityContext call. And implement the RapidoReach onPause() and onResume() calls. Replace the YOUR_API_TOKEN with the actual api key found on your app. Replace YOUR_USER_ID with your unique ID for your appuser. If you do not have a unique user ID we recommend just using their Google Advertising ID (GPS_ID)
//initialize RapidoReach
RapidoReach.initWithApiKeyAndUserIdAndActivityContext(`YOUR_API_TOKEN`, `YOUR_USER_ID`, this);

//customize navigation header
RapidoReach.getInstance().setNavigationBarText("Demo App");
RapidoReach.getInstance().setNavigationBarColor("#211548");
RapidoReach.getInstance().setNavigationBarTextColor("#FFFFFF");

//set reward and survey status listeners
RapidoReach.getInstance().setRapidoReachRewardListener(this);
RapidoReach.getInstance().setRapidoReachSurveyListener(this);
RapidoReach.getInstance().setRapidoReachSurveyAvailableListener(this);
Reward Center
Next, in your activity, implement the logic to display the reward center. Call the showRewardCenter method when you are ready to the send the user into the reward center where they can complete surveys in exchange for your virtual currency. We automatically convert the amount of currency a user gets based on the conversion rate specified in your app.
Button btn = (Button) findViewById(R.id.button);
btn.setOnClickListener(new View.OnClickListener() {
    @Override
    public void onClick(View view) {
        Log.d(TAG, "Button is clicked");
        if (RapidoReach.getInstance().isSurveyAvailable()) {
            RapidoReach.getInstance().showRewardCenter();
        }
    }
});
Reward Callback
To ensure safety and privacy, we notify you of all awards via a server side callback. In the developer dashboard for your App add the server callback that we should call to notify you when a user has completed an offer. Note the user ID pass into the initialize call will be returned to you in the server side callback. More information about setting up the callback can be found in the developer dashboard.
The quantity value will automatically be converted to your virtual currency based on the exchange rate you specified in your app. Currency is always rounded in favor of the app user to improve happiness and engagement.
Client Side Award Callback
For security purposes we always recommend that developers utilize a server side callback, however we also provide APIs for implementing a client side award notification if you lack the server structure or a server altogether or want more real-time award notification. It's important to only award the user once if you use both server and client callbacks (though your users may not be opposed!).
public class MyActivity extends Activity implements RapidoReachRewardListener {

    @Override
    protected void onCreate(Bundle savedInstanceState) {
        ...
        // initialize RapidoReach
        super.onCreate();
        RapidoReach.initWithApiKeyAndUserIdAndActivityContext("YOUR_API_TOKEN", "YOUR_USER_ID", "YOUR_ACTIVITY");

        // set RapidoReach client-side reward listener
        RapidoReach.getInstance().setRapidoReachRewardListener(this);

    }

    // implement callback for award notification
    @Override
    public void onReward(int i) {
        Log.d(TAG, "onReward: " + i);

    }
}
Reward Center Events
You can optionally listen for the onRewardCenterOpened and onRewardCenterClosed events by implementing the RapidoReachSurveyListener interface.
public class MyActivity extends Activity implements RapidoReachSurveyListener {

    @Override
    protected void onCreate(Bundle savedInstanceState) {
        ...
        // initialize RapidoReach
        super.onCreate();
        RapidoReach.initWithApiKeyAndUserIdAndActivityContext("YOUR_API_TOKEN", "YOUR_USER_ID", "YOUR_ACTIVITY");

        // set RapidoReach survey event listener
        RapidoReach.getInstance().RapidoReachSurveyListener(this);

    }

    // reward center opened. time to start earning content!
    @Override
    public void onRewardCenterOpened() {
        Log.d(TAG, "onRewardCenterOpened");
    }

    // reward center closed. restart music/app.
    @Override
    public void onRewardCenterClosed() {
        Log.d(TAG, "onRewardCenterClosed");
    }
}
Survey Available Callback
If you'd like to be notified when a survey is available you can add a listener:
public class MyActivity extends Activity implements RapidoReachSurveyAvailableListener {

    @Override
    protected void onCreate(Bundle savedInstanceState) {
        ...
        // initialize RapidoReach
        super.onCreate();
        RapidoReach.initWithApiKeyAndUserIdAndActivityContext("YOUR_API_TOKEN", "YOUR_USER_ID", "YOUR_ACTIVITY");

        // set RapidoReach survey available listener
        RapidoReach.getInstance().setRapidoReachSurveyAvailableListener(this);

    }

    // implement callback for survey available
    @Override
    public void rapidoReachSurveyAvailable(int surveyAvailable) {
        Log.d(TAG, "rapidoreachSurveyAvailable: " + surveyAvailable);
    }
}
Testing SDK
When you initially create your app we automatically set your app to Test mode. While in test mode a survey will always be available. Note - be sure to set your app to Live in your dashboard before your app goes live or you won't serve any real surveys to your users!
Customizing SDK
We provide several methods to customize the navigation bar to feel like your app.
RapidoReach.getInstance().setNavigationBarText("Demo App");
RapidoReach.getInstance().setNavigationBarColor("#17b4b3");
RapidoReach.getInstance().setNavigationBarTextColor("#FFFFFF");Unity SDK
RapidoReach Unity Integration Guide
Get Your API Key
Sign-up for a new developer account and create a new Unity app here and copy your API Key.
Download the Plugin
Download the latest version of the RapidoReach Unity Plugin here.
Import the Unity Package
From Unity go to Assets menu → Import package → Custom package → choose the unzipped unity package.
Android
Ensure the RapidoReach-1.0.0.aar and other files were successfully imported with the RapidoReach.cs file in your "Assets/Plugins" folder.
In your player settings ensure the minimum API is set to 15 (Jelly Bean) or higher.
Initialize RapidoReach
We recommend initializing RapidoReach as soon as possible so we can begin preparing surveys for the user. In the Initialize method you'll set your API key and the user's ID that will be passed back into your server side callback when the user has earned currency for completing a survey.
  #if UNITY_ANDROID || UNITY_IOS

  // Your GameObject that triggers the Reward Center

  void Start()
  {
    ConfigureRapidoReach();
  }
    public void ConfigureRapidoReach()
  {
#if UNITY_IOS || UNITY_ANDROID
    RapidoReach.Initialize("d5ece53df8ac97409298325fec81f3f7", "ANDROID_TEST_ID");
    RapidoReach.SetListener(gameObject.name);

    // optional
    RapidoReach.SetNavigationBarText("RapidoReach Unity N");
    RapidoReach.SetNavigationBarColor("#211548");
    RapidoReach.SetNavigationBarTextColor("#FFFFFF");
#endif
  }

  // call this function to show reward center on button click etc
  public void showRewardCenter(){
    Debug.Log("UNITY: Calling show reward center");
#if UNITY_IOS || UNITY_ANDROID
    RapidoReach.ShowRewardCenter();
#endif
  }

  void OnReward(string quantity)
  {
    FindObjectOfType<ReceivedRewards>().GetComponent<Text>().text = quantity;
    Debug.Log("RapidoReach OnReward: " + quantity);
  }

  void OnRewardCenterOpened()
  {
    FindObjectOfType<ReceivedRewards>().GetComponent<Text>().text = "Loading ...";
    Debug.Log("RapidoReach OnRewardCenterOpened!");
  }

  void OnRewardCenterClosed()
  {
    Debug.Log("RapidoReach OnRewardCenterClosed!");
  }

  void RapidoReachSurveyAvailable(string available)
  {
    Debug.Log("RapidoReach RapidoReachSurveyAvailable: " + available);
  }

  #endif
Google Play Services
A Google Advertising ID helps us serve offers and surveys so we recommend adding Google Play Services to your project. We provide the files to pull this in for you.
iOS
Ensure the UnityPluginBridge.mm and RapidoReachSDK-Bridging-Header.h files and frameworks folder are in your "Assets/Plugins/iOS" folder and the RapidoReach.cs file is in your "Assets/Plugins" folder.
Initialize RapidoReach
We recommend initializing RapidoReach as soon as possible so we can begin preparing surveys for the user. In the Initialize method you'll set your API key and the user's ID that will be passed back into your server side callback when the user has earned currency for completing a survey.
  #if UNITY_ANDROID || UNITY_IOS

  // Your GameObject that triggers the Reward Center

  void Start()
  {
    ConfigureRapidoReach();
  }
    public void ConfigureRapidoReach()
  {
#if UNITY_IOS || UNITY_ANDROID
    RapidoReach.Initialize("d5ece53df8ac97409298325fec81f3f7", "ANDROID_TEST_ID");
    RapidoReach.SetListener(gameObject.name);

    // optional
    RapidoReach.SetNavigationBarText("RapidoReach Unity N");
    RapidoReach.SetNavigationBarColor("#211548");
    RapidoReach.SetNavigationBarTextColor("#FFFFFF");
#endif
  }

  // call this function to show reward center on button click etc
  public void showRewardCenter(){
    Debug.Log("UNITY: Calling show reward center");
#if UNITY_IOS || UNITY_ANDROID
    RapidoReach.ShowRewardCenter();
#endif
  }

  void OnReward(string quantity)
  {
    FindObjectOfType<ReceivedRewards>().GetComponent<Text>().text = quantity;
    Debug.Log("RapidoReach OnReward: " + quantity);
  }

  void OnRewardCenterOpened()
  {
    FindObjectOfType<ReceivedRewards>().GetComponent<Text>().text = "Loading ...";
    Debug.Log("RapidoReach OnRewardCenterOpened!");
  }

  void OnRewardCenterClosed()
  {
    Debug.Log("RapidoReach OnRewardCenterClosed!");
  }

  void RapidoReachSurveyAvailable(string available)
  {
    Debug.Log("RapidoReach RapidoReachSurveyAvailable: " + available);
  }

  #endif
Libraries
We include a post processing script to automatically include all libraries into your project and perform any additional configuration in the build settings. See the iOS guide if you would like to verify your Xcode project setup.
Reward Callback
To ensure safety and privacy, we notify you of all awards via a server side callback. This callback will be triggered for both Android and iOS apps.
In the developer dashboard for your App add the server callback that we should call to notify you when a user has completed an offer. Note the user ID pass into the initialize call will be returned to you in the server side callback. More information about setting up the callback can be found in the developer dashboard.
The quantity value will automatically be converted to your virtual currency based on the exchange rate you specified in your app. Currency is always rounded in favor of the app user to improve happiness and engagement.
Client Side Award Callback
For security purposes we always recommend that developers utilize a server side callback, however we also provide APIs for implementing a client side award notification if you lack the server structure or a server altogether or want more real-time award notification. It's important to only award the user once if you use both server and client callbacks (though your users may not be opposed!).
In order to receive notifications you must implement the OnReward method on the GameObject you'd like to receive notifications that a user earned content. Then you must register that gameObject with the SetListener method.
Additionally you can also implement OnRewardCenterOpened and OnRewardCenterClosed to listen to events and RapidoReachSurveyAvailable to listen to when a survey is available.
  #if UNITY_ANDROID || UNITY_IOS

  // Your GameObject that triggers the Reward Center

  void Start()
  {
    ConfigureRapidoReach();
  }
    public void ConfigureRapidoReach()
  {
#if UNITY_IOS || UNITY_ANDROID
    RapidoReach.Initialize("d5ece53df8ac97409298325fec81f3f7", "ANDROID_TEST_ID");
    RapidoReach.SetListener(gameObject.name);

    // optional
    RapidoReach.SetNavigationBarText("RapidoReach Unity N");
    RapidoReach.SetNavigationBarColor("#211548");
    RapidoReach.SetNavigationBarTextColor("#FFFFFF");
#endif
  }

  // call this function to show reward center on button click etc
  public void showRewardCenter(){
    Debug.Log("UNITY: Calling show reward center");
#if UNITY_IOS || UNITY_ANDROID
    RapidoReach.ShowRewardCenter();
#endif
  }

  void OnReward(string quantity)
  {
    FindObjectOfType<ReceivedRewards>().GetComponent<Text>().text = quantity;
    Debug.Log("RapidoReach OnReward: " + quantity);
  }

  #endif
Testing SDK
When you initially create your app we automatically set your app to Test mode. While in test mode a survey will always be available. Note - be sure to set your app to Live in your dashboardt before your app goes live or you won't serve any real surveys to your users!
Customizing SDK
We provide several methods to customize the navigation bar to feel like your app.
  RapidoReach.SetNavigationBarText("RapidoReach Unity N");
  RapidoReach.SetNavigationBarColor("#211548");
  RapidoReach.SetNavigationBarTextColor("#FFFFFF");
React Native SDK
@rapidoreachsdk/react-native-rapidoreach
Before you start
Get your API key
Sign-up for a new developer account and create a new app here and copy your API Key.
Getting started
$ npm install @rapidoreachsdk/react-native-rapidoreach
$ yarn add react-native-webview
$ cd ios && pod install && cd .. # CocoaPods on iOS needs this extra step
We are all set up! Now let's use the module.
Usage
Initialize RapidoReach
First, you need to initialize the RapidoReach instance with initWithApiKeyAndUserId call.
// Import RapidoReach native module
import RapidoReach from '@rapidoreachsdk/react-native-rapidoreach';

componentDidMount() {
  // In your app initialization, initialize RapidoReach
  RapidoReach.initWithApiKeyAndUserId('YOUR_API_TOKEN', 'YOUR_USER_ID');
}
Reward Center
Next, implement the logic to display the reward center. Call the showRewardCenter method when you are ready to send the user into the reward center where they can complete surveys in exchange for your virtual currency. We automatically convert the amount of currency a user gets based on the conversion rate specified in your app.
onPressShowRewardCenter = () => {
  RapidoReach.isSurveyAvailable((isAvailable) => {
    // if a survey is available, show the reward center
    if (isAvailable) {
      RapidoReach.showRewardCenter();
    }
  })
}
Reward Callback
To ensure safety and privacy, we recommend using a server side callback to notify you of all awards. In the developer dashboard for your App add the server callback that we should call to notify you when a user has completed an offer. Note the user ID pass into the initialize call will be returned to you in the server side callback. More information about setting up the callback can be found in the developer dashboard.
The quantity value will automatically be converted to your virtual currency based on the exchange rate you specified in your app. Currency is always rounded in favor of the app user to improve happiness and engagement.
Client Side Award Callback
If you do not have a server to handle server side callbacks we additionally provide you with the ability to listen to client side reward notification.
First, import Native Module Event Emitter:
import { RapidoReachEventEmitter } from '@rapidoreachsdk/react-native-rapidoreach';Then, add event listener for award notification (in componentWillMount, for example):
this.onRewardListener = RapidoReachEventEmitter.addListener(
  'onReward',
  this.onReward,
);
Implement the callback:
onReward = (quantity) => {
  console.log('reward quantity: ', quantity);
}
Reward Center Events
You can optionally listen for the onRewardCenterOpened and onRewardCenterClosed events that are fired when your Reward Center modal is opened and closed.
Add event listeners for onRewardCenterOpened and onRewardCenterClosed:
this.onRewardCenterOpenedListener = RapidoReachEventEmitter.addListener(
  'onRewardCenterOpened',
  this.onRewardCenterOpened,
);
this.onRewardCenterClosedListener = RapidoReachEventEmitter.addListener(
  'onRewardCenterClosed',
  this.onRewardCenterClosed,
);
Implement event callbacks:
onRewardCenterOpened = () => {
  console.log('onRewardCenterOpened called!');
}

onRewardCenterClosed = () => {
  console.log('onRewardCenterClosed called!');
}
Survey Available Callback
If you'd like to be proactively alerted to when a survey is available for a user you can add this event listener.
First, import Native Module Event Emitter:
import { RapidoReachEventEmitter } from '@rapidoreachsdk/react-native-rapidoreach';Then, add event listener for award notification (in componentWillMount, for example):
this.rapidoreachSurveyAvailableListener = RapidoReachEventEmitter.addListener(
  'rapidoreachSurveyAvailable',
  this.rapidoreachSurveyAvailable,
);
Implement the callback:
rapidoreachSurveyAvailable = (surveyAvailable) => {
  if (surveyAvailable == "true") {
    console.log('rapidoreach survey is available');
  } else {
    console.log('rapidoreach survey is NOT available');
  }
}
Finally, don't forget to remove your event listeners in the componentWillUnmount lifecycle method:
componentWillUnmount() {
  this.onRewardListener.remove();
  this.onRewardCenterOpenedListener.remove();
  this.onRewardCenterClosedListener.remove();
  this.rapidoreachSurveyAvailableListener.remove();
}
Contact
Please send all questions, concerns, or bug reports to admin@rapidoreach.com.
FAQ
What do you do to protect privacy?
We take privacy very seriously. All data is encrypted before being sent over the network. We also use HTTPS to ensure the integrity and privacy of the exchanged data.
What kind of analytics do you provide?
Our dashboard will show metrics for sessions, impressions, revenue, and much more. We are constantly enhancing our analytics so we can better serve your needs.
What is your fill rate?
We have thousands of surveys and add hundreds more every day. Most users will have the opportunity to complete at least one survey on a daily basis.
I'm ready to go live! What are the next steps?
Let us know! We'd love to help ensure everything flows smoothly and help you achieve your monetisation goals!
Following the rewarded and/or theOfferwall approach
An example is provided on Github that demonstrates how a publisher can implement the rewarded and/or the Offerwall approach. Upon survey completion, the publisher can reward the user.
Limitations / Minimum Requirements
This is just an initial version of the plugin. There are still some limitations:
- You cannot pass custom attributes during initialization
- No tests implemented yet
- Minimum iOS is 9.0 and minimum Android version is 16
For other RapidoReach products, see RapidoReach docs.
ReactNativeSDK
Flutter SDK
flutter_rapidoreach
A plugin for Flutter that supports rendering surveys using RapidoReach SDKs. You can install rapidoreach flutter plugin from here
Note: RapidoReach iOS SDK utilizes Apple's Advertising ID (IDFA) to identify and retarget users with RapidoReach surveys. As of iOS 14 you should initialize RapidoReach Flutter plugin in iOS only if the relevant IDFA permission was granted by the user
Initializing the plugin
The RapidoReach plugin must be initialized with a RapidoReach API Key. You can retrieve an API key from RapidoReach Dashboard when you sign up and create a new app.
Usage
Initialize RapidoReach
First, you need to initialize the RapidoReach instance with init call.
// Import RapidoReach package
import 'package:rapidoreach/RapidoReach.dart';

RapidoReach.instance.init(apiKey: 'YOUR_API_TOKEN', userId: 'YOUR_USER_ID')
Reward Center
Next, implement the logic to display the reward center. Call the show method when you are ready to send the user into the reward center where they can complete surveys in exchange for your virtual currency. We automatically convert the amount of currency a user gets based on the conversion rate specified in your app.
RapidoReach.instance.show(),Reward Callback
To ensure safety and privacy, we recommend using a server side callback to notify you of all awards. In the developer dashboard for your App add the server callback that we should call to notify you when a user has completed an offer. Note the user ID pass into the initialize call will be returned to you in the server side callback. More information about setting up the callback can be found in the developer dashboard.
The quantity value will automatically be converted to your virtual currency based on the exchange rate you specified in your app. Currency is always rounded in favor of the app user to improve happiness and engagement.
Client Side Award Callback
If you do not have a server to handle server side callbacks we additionally provide you with the ability to listen to client side reward notification.
RapidoReach.instance.setOnRewardListener(onRapidoReachReward);Implement the callback:
void onRapidoReachReward(int quantity) {
    print('TR: $quantity');
}
Reward Center Events
You can optionally listen for the setRewardCenterOpened and setRewardCenterClosed events that are fired when your Reward Center modal is opened and closed.
Add event listeners for onRewardCenterOpened and onRewardCenterClosed:
RapidoReach.instance
        .setRewardCenterClosed(onRewardCenterClosed);
RapidoReach.instance
        .setRewardCenterOpened(onRewardCenterOpened);
Implement event callbacks:
void onRewardCenterOpened() {
  print('onRewardCenterOpened called!');
}

void onRewardCenterClosed() {
  print('onRewardCenterClosed called!');
}
Survey Available Callback
If you'd like to be proactively alerted to when a survey is available for a user you can add this event listener.
First, import Native Module Event Emitter:
RapidoReach.instance
        .setSurveyAvaiableListener(onRapidoReachSurveyAvailable);
Implement the callback:
void onRapidoReachSurveyAvailable(int survey) {
    print('TR: $survey');
}
Following the rewarded and/or theOfferwall approach
An example is provided on Github that demonstrates how a publisher can implement the rewarded and/or the Offerwall approach. Upon survey completion, the publisher can reward the user.
Limitations / Minimum Requirements
This is just an initial version of the plugin. There are still some limitations:
- You cannot pass custom attributes during initialization
- No tests implemented yet
- Minimum iOS is 9.0 and minimum Android version is 16
For other RapidoReach products, see RapidoReach docs.
Getting Started
If you would like to review an example in code please review the Github project.
Publisher API's
Reconcillations reports API
RapidoReach Publisher API Guide
Reconcialation Report API
Method: GET
URL: http://www.rapidoreach.com/api/v1/reconciliations/{{publisher_id}}/{{app_id}}?key={{app_api_key}}&limit=3&skip=2Params
publisher_id: Publisher User id app_id: App id
Query
app_api_key: API Key generated for an app. It can be found on publisher portal
limit: it is a number of records to fetch in one query request. It is limited to maximum 500 records for performance reasons
skip: Number of records to be skipped.
For example there are total 350 records are available. You can then fetch it as follows
set skip = 0 and limit = 100 -> it will show first 100 records
set skip = 100 and limit 100 -> to get another set of 100 records
set skip = 200 and limit 100 -> to get another set of 100 records
set skip = 300 and limit 100 -> to get another set of 50 records
At this point records retrieved (50) are less than requested (limit = 100) hence there are no more records are available to fetch
Records the total number of records retrived it skip (300) + final call records (50) = 350 in total
Store this number in your system
Next time start from this number and retrieve from 350 ie skip = 350
set skip = 350 and limit 100 and so on